Finally, you need to take action based on the reports generated. The action may include informal warnings, publishing lists of frequent abusers and using tools to control or limit access. There are tools available to control specific types of applications, such as chat clients, Kazaa and download accelerators. Also, there are tools that can perform multiple functions, such as control Web access and chat simultaneously. Then there are tools that can do application prioritization to help provide the QoS (Quality of Server) to applications that really need it. Let’s talk about how to control these applications using various tools.
For blocking sites, you can use a tool called SurfControl that needs to be installed on a gateway machine (which in our case was Windows 2000 Advance Server). You can buy SurfControl for Rs 99,000 for 50 users from http://foresightho.com/
During installation, Surf- Control will prompt you to select the network segment that you want to monitor and control. After installing it, install MSDE (Microsoft’s SQL Data Engine). SurfControl provides its own version of MSDE, which contains SurfControl’s rules database as well. The software uses SQL database to store Web filters and policies.
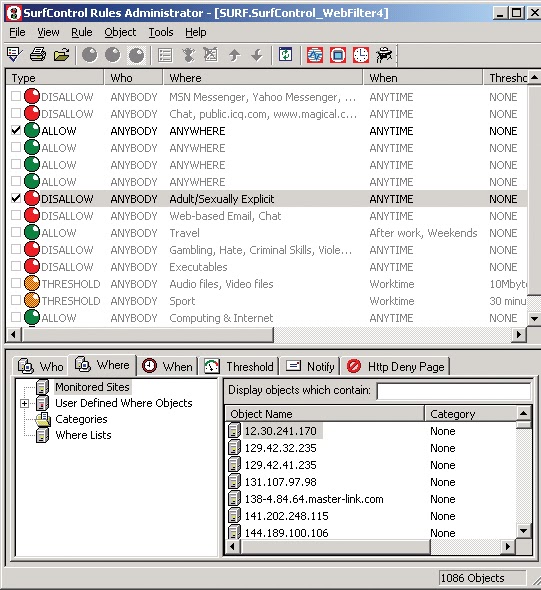
Create access rules to restrict unwanted Web content, using SurfControl
Before you can filter Web content, you need to stop all the Surf-Control services. Do so by right clicking on the SurfControl icon in the system tray. After this create a database in SQL server. For this, open ‘Create MSDE/SQL Database’ from Start > Programs > SurfControl Web Filter. This will launch a wizard that will create a database in SQL. First, the wizard will ask you the name of the server on which you would like to create the database. Give the name of the SQL server and click on Next. Then you will be asked to set the type of authentication for accessing the database. Here you have two authentication options, one is ‘Use Trusted Authentication’ and the other is ‘SQL Authentication’. We used the first one to keep it simple; this authentication mode uses Windows username and password for database access. When you click on Next, you will get the remaining options. Select all the options and click on Next and then on Finish. With this your SurfControl is ready for use.
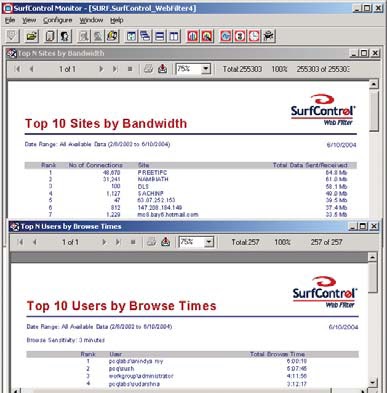
A report by SurfControl showing the top 10 sites visited and users who spent maximum time online. SurfControl has built-in standard and real-time monitoring tools, which will give you detailed reports showing which machine is hogging how much bandwidth. It also shows which machines are accessing which websites. Now to create rules for filtering specific Web content, go to Start > programs > SurfControl Web Filer > Rules Administrator. This will open a window showing you a few pre-created sample rules for corporate environments. You have to check the Rules box and click on Commit from the menu bar to apply changes. These sample rules restrict adult, gambling, online video/audio and hacking content. Rules can be applied based on IP addresses, MAC addresses, machine names and domain users. It also has a wizard that guides you in creating rules according to your organizational needs. To create new rules click on ‘Add Rule Wizard’ from the toolbar.
The rules can be of three types: Allow Deny and Threshold. By default, it is set to allow. If you need Deny or Threshold rule, then check on the option you want and click on Next to continue. Once this is done, the wizard follows a step-by-step procedure and asks you to specify the objects you wish to add to the rule. These objects are Who, Where, When and Notify objects. You will also be asked for the status of the rule, active or inactive, and where you want this rule to appear in the Rules Administrator. This is important as rules are processed in a top-down manner so, whether a rule is triggered depends on what rules are given above in the list. If you want to change any of these rules then click on Next. This will take you to a dialogue box where you can configure each object. Finally, a Finish screen will appear where you can check the details of the rule objects that you have created and click on Finish. After creating all the rules remember to click on Commit in the toolbar, so that the rules that you have created can be applied.

EmoticonEmoticon